WindowFrame Layouts using Themes and Stylesheets
Using a combination of Unity Theme (TSS) and Style Sheet (USS) assets you can create any User Interface
Window Framework uses the Unity theme system for display settings and supports both TSS (Unity Themes) and USS (Stylesheets) as an asset. The Unity Theme system works much like the HTML stylesheet standard with additional functionality to meet the needs of the environment. Using these two asset types together gives you a powerful tool for creating themes to meet any need and the option to set that theme at any time.
Theme System Layout
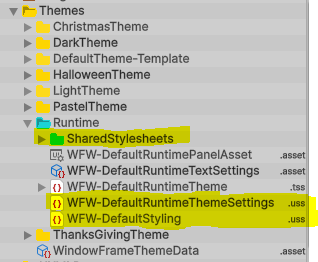
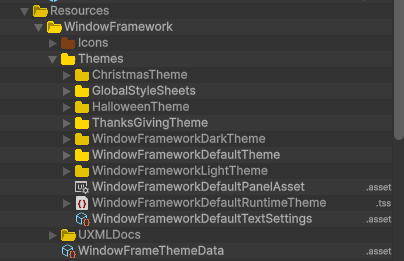 The Recomended Theme system layout shown here for clarity but is not a required template. While you are free to store your files anywhere you like, following some type of general standard will help you find your files later. We use the Resources folder for storage of all icons, images, stylesheets and themes as shown in the screenshot of our resources folder layout. Within the WindowFramework/Themes folder you see a sub-folder for each pre-defined theme. Each of these folders hold several Stylesheet files and one Theme file. In Unity Theme system you select the Theme asset and then you can Add all of the stylesheets that make up that theme.
The Stylesheets that make up the Theme will be added to the stylesheets that make up the global theme when applied. The Runtime Theme Asset is like a Theme Asset but has the default Unity settings applied. With our system only one is needed with it and the Text Settings Asset linked to the Default Panel Asset that is then assigned to the UI Document Component... I know its a lot to get your head around but it will hopefully become clearer as we go on.
Note: We plan on expanding our New Theme Manager Window to automate this process in future releases.
Recommended Theme File Layout
The Unity Theme system is very robust however this power allows for problems to happen even though it may seam valid. This usually happens due to load order and runtime differences from the editor. We have tested various ways of applying themes in a reliable way and creating your themes using the following procedures produce reliable results while also being available in the UI Builders theme dropdown list. To fully understand the layouts we need cove the purpose of each of the three (3) files types: Runtime Theme File, Theme File, and Stylesheet File. All three file types are used in our recommended implementation using the built in inheritance system, however our method is only one of many viable methods of using the theme system. Basic overview is a single Runtime theme file for the system that contains all global data. A single theme file for each theme you want available that acts as a linker file. Atleast one stylesheet containing the variable values for the theme.
The Runtime Theme File
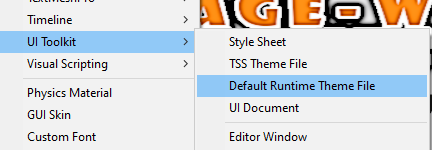 Creating a base Runtime Theme File is the first step, now to be clear there are two (2) types of theme files, a standard Unity Theme file and a Runtime Theme file, the only difference being that the Runtime Theme file has an @import statement that includes the default Unity stylesheet
 @import url("unity-theme://default"); Also, you really only need one of these files since when you have several, you get duplication in lists with references to the 'default' stylesheet. This is happens because each Runtime theme imports it as a separate instance. Since they are all imports, they are all the same file but having errant file links floating around may cause them to break later during some random cleanup of your project. Also, Unity stylesheet links are kind of touchy in that any changes in anem or path will cause the reference to break. There are several options at this point, you can make yet another file to hold the global styles that you can then link as an aditional import in this file, or you can place global definitions directly in the theme file itself since it is also treated as a stylesheet. We recomend you use the USS variable system and place all variable powered theme elements here along with a link to a default values style sheet.
The Standard Theme File
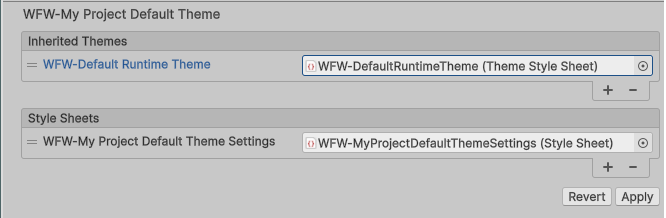
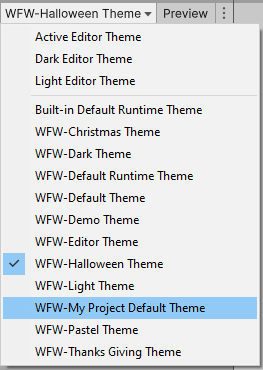
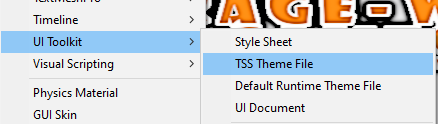 The Standard TSS Theme file, as stated before is the same as a runtime theme file without the @import call to the default Unity theme file. In the window framework, one (1) os these are recomended for each theme in the system. This file will also be the one listed in the Theme dropdown available in UI Builder so choose a memerable name or follow some sort of naming convention. We recomend WFW-[ThemeName]Theme for the Theme filename with [Theme] replaced with your theme name. This file will be used to link the runtime theme, current theme settings and any other items you want to include with the final theme together as shown in the recomended layout image.
The Stylesheet File
The Standard stylesheet file is used to store the values for your USS variables, If you are unfamiliar with the variables system then check out the Unity Docs on USS Variable for more details. Placing the theme specific values here gives you a single place to edit that allows full customization.
Creating Window Framework Themes in Unity 6
Recommended Creation Workflow
Creating themes is a straight forward process even though there are several steps involved.
We plan on automating this process from the Theme Manager Window in future versions.
Important Note: Unity Theme Stylesheet references tend to break if you move or rename a stylesheet file. For this reason you should pick a location in your project for your themes and sick with it. Unity may fix this in future versions but as of the time of this writing, it is a problem. Altering the data IN the files are fine but location and name need to be consistant or you will get stylesheet import errors and have to re-link your Stylesheets within the ThemeStylesheet asset.
-
Create a Themes folder for your project
 In order to keep your themes independant of the asset you want to create a place to hold your themes. We recomend
 Assets/Resources/Themesas this location would be outside of the asset and descriptive of its purpose based on location but you can use any folder that best suits your project layout. The only major requirments being that:- Your themes folder should NOT be within the WindowFramework assets folder so that future updates do not effect your data.
-
Your themes folder be placed within a
Resourcesfolder so thatResources.Load()calls can operate properly
- Decide to use our Runtime or Your Own
The runtime theme assets apply the styles using the settings in the individual 'Themes' and therefor require additional considerations.
This tutorial is focused on Creating Themes but we wanted to point out this important step.
If you want your system to have instant access to any updates we make to our theme design then you can use the Default Runtime panel settings and theme files provided by the asset. We are going to make every effort to keep the theme system consistant going forward but sometimes things must be changed so please keep that in mind.
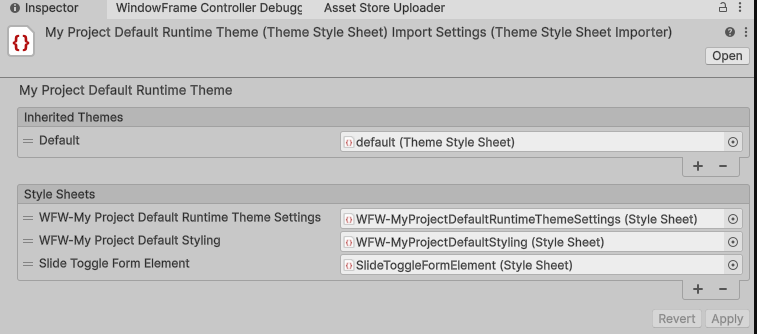
If you want to have your own or have an exisitng runtime and want to use ours as a starting point then you can read about The Window Frame Controller Scene Object for instructions on creating one or linking the needed files to your existing asset, or use the following images as reference.Files to Copy when making your own Runtime

When making your own Runtime, copy the files shown, rename them and link them as shown in the images
- Create a Default Theme Sub-Folder
Create a sub-folder in Themes to hold your new theme, for this example we will use:
MyProjectDefaultTheme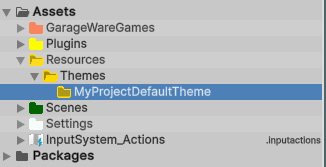
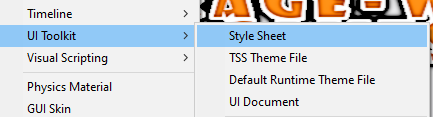
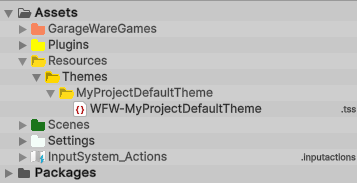
- Create Theme File
Create a new ThemeStylesheet within the folder you created, sor this example we will use:
WFW-MyProjectDefaultTheme
We recomend the WFW prefix so it is easy to find in later lists but any suiable prefix will work.
- Copy Template
Make a duplicate of the Default Theme Settings USS file by selecting the WFW-DefaultThemeSettings.uss file and pressing
CTRL+Dto make a copy, the new file will have a 1 added to the end.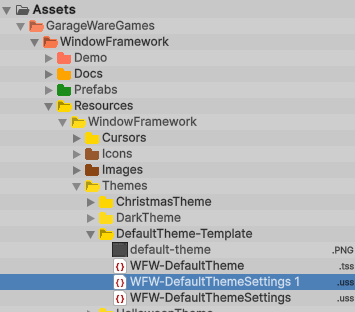
- Move Copied Template file
Move the duplicated file to your new themes folder so that it stays orginized and out of the asset folder.
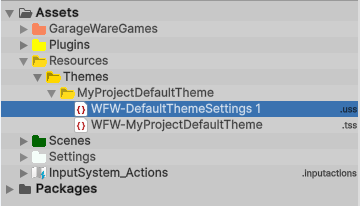
- Rename Copied Template
Rename File to match your new theme name, for this example it will be:
WFW-MyProjectDefaultThemeSettings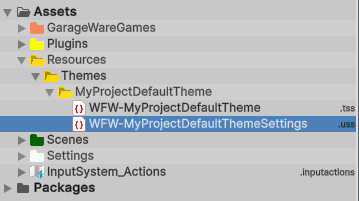
- Link the files in the Theme Stylsheet
Select the
WFW-MyProjectDefaultThemefile and look in the inspector. your will need to link all the files needed to make up a usable theme as shown in the image, using this example. Note that theWFW-DefaultRuntimeThemein inherited, this is required so that all the base styling applications are loaded. The Settings file we coppied has only the values that are needed by the Runtime file. Make sure to click Apply to save the data file (Unity stylesheets settings made in the inspector are not dynamically updated) Once everything is linked up you will be able to see your new theme in the UI Bulder Themes dropdown list but you will still need a data file to use it in the Window Framework at runtime. One more thing to note is that Unity Theme StyleSheets do not like being moved OR having the linked files moved, if they are the links break and have to be recreated. We have decided to make our runtime theme location and naming a static part of our asset going forward so that you can build integrations with reasonible reliability that the files will be there.
-
Modifying Theme Settings
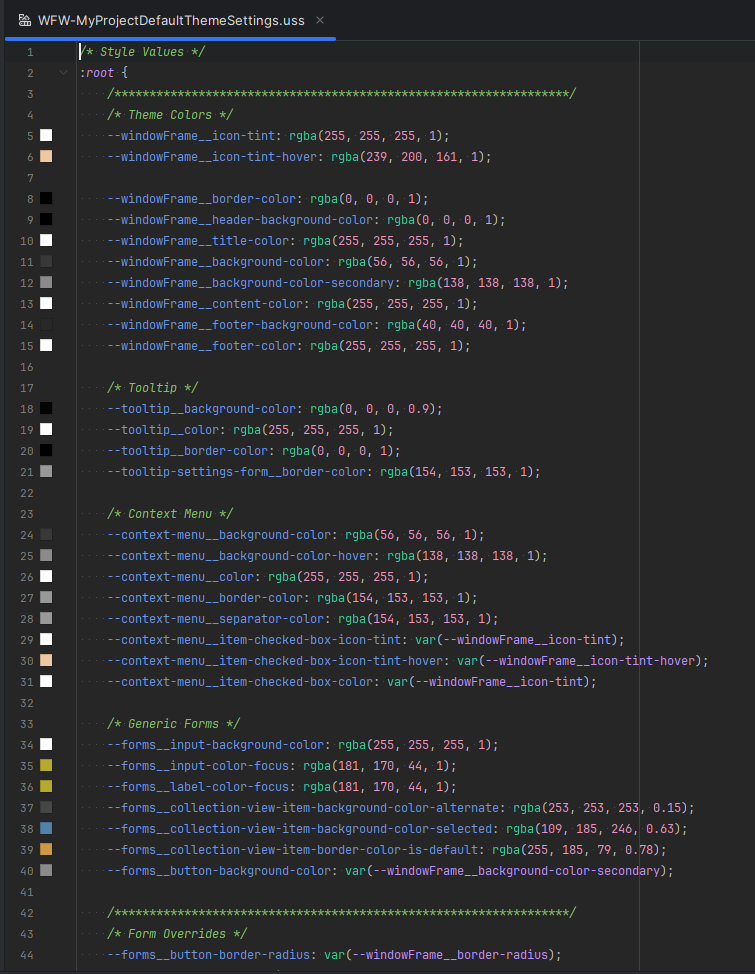
Themes have lots of available settings and more can be added by you as needed to meet the needs of your layout design. We recommend you use and expand on the USS variable system that we have established, but you are free to modify or even replace as needed. The setting file (WFW-MyProjectDefaultThemeSettings.uss is following project setup) is the only file that you should need to modify. if has been organized with the coloring options all placed at the top of the file but there are many available setting thoughout the file. Each section has been labeled with a comment header so you can find the area you are looking for.
We have established a named convention for our variable names that follows the following pattern:
[ElementName]__[USS-Styling-Option]
SO for the windowFrame border width you would use:
--windowFrame__border-width: 5px;// effect all borders
--windowFrame__border-top-width: 5px;// effect top border only
If major changes are wanted in the base layout that are outside of nornal cascading options then you may need to look at making a new runtime theme setup that is independent of the framework (like the general theme separation). You can do this by replication of the Runtime folder in the Window Frameworks default Theme Folder to you own, making sure to update file links as necessary.
Please Note: Some of the setting's the the runtime styling file that are hard coded and are REQUIRED for proper window operation, be VERY CARFULL when modifying this file or its settings.
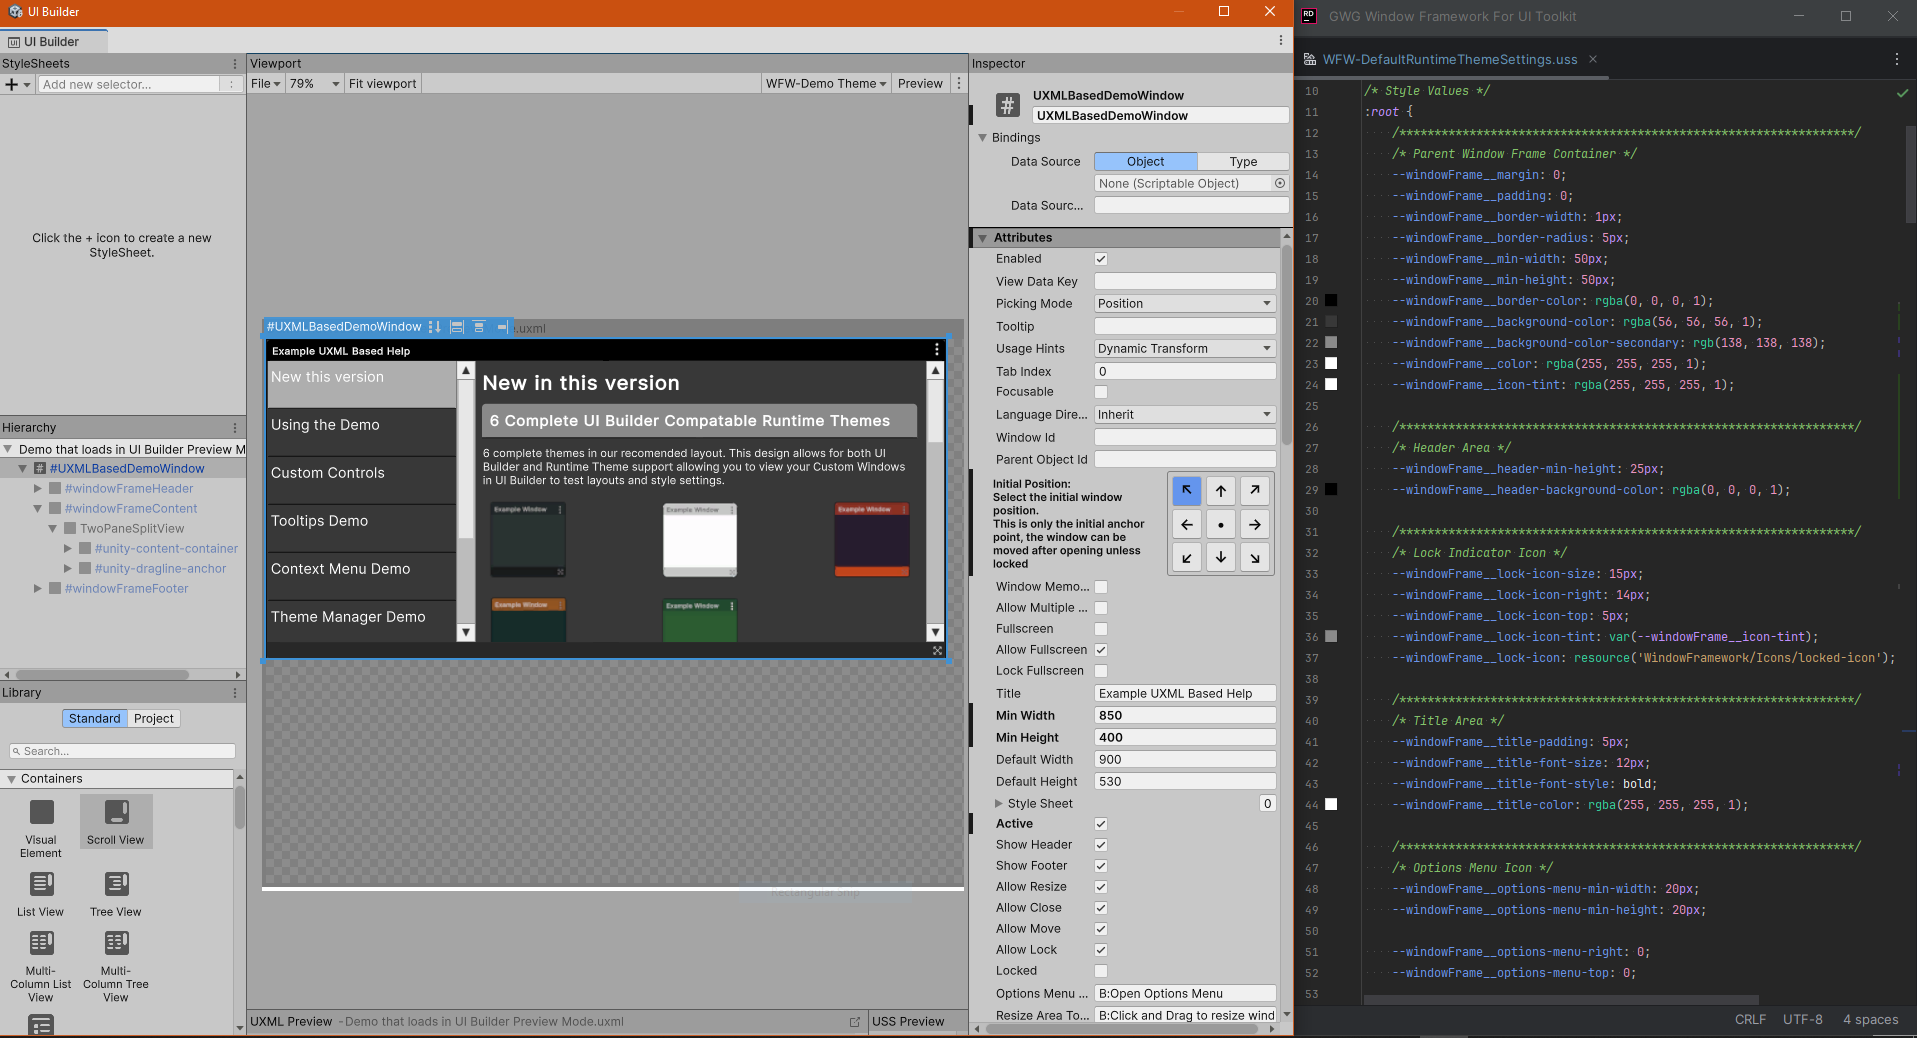
Modification of the base theme settings should not be needed since USS cascades like HTML stylesheets so new settings can be added almost anywhere providing the load order is correct and the controller has options for load order and additional global stylesheets or theme files.Default Theme Settings File in Code View
Creating New Stylesheets Using UI Builder
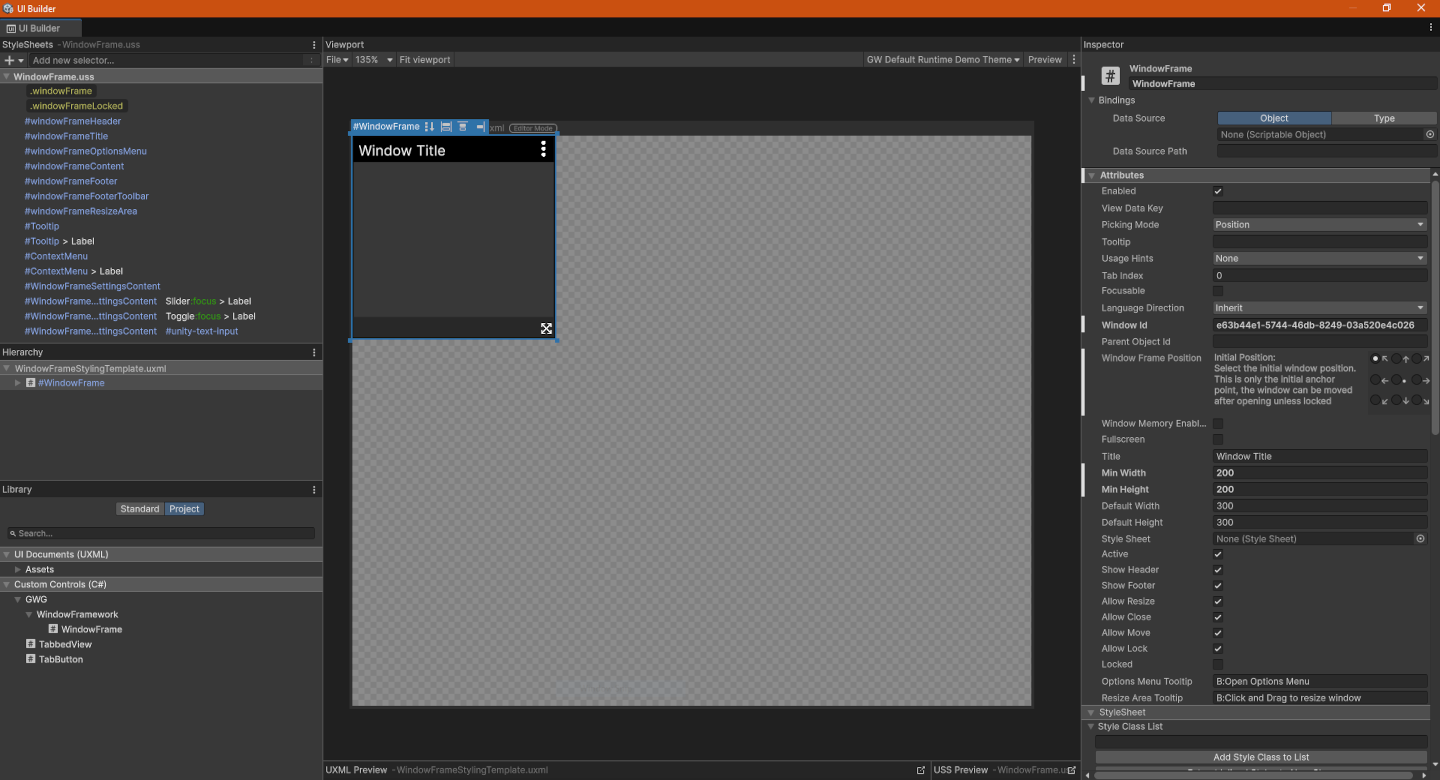
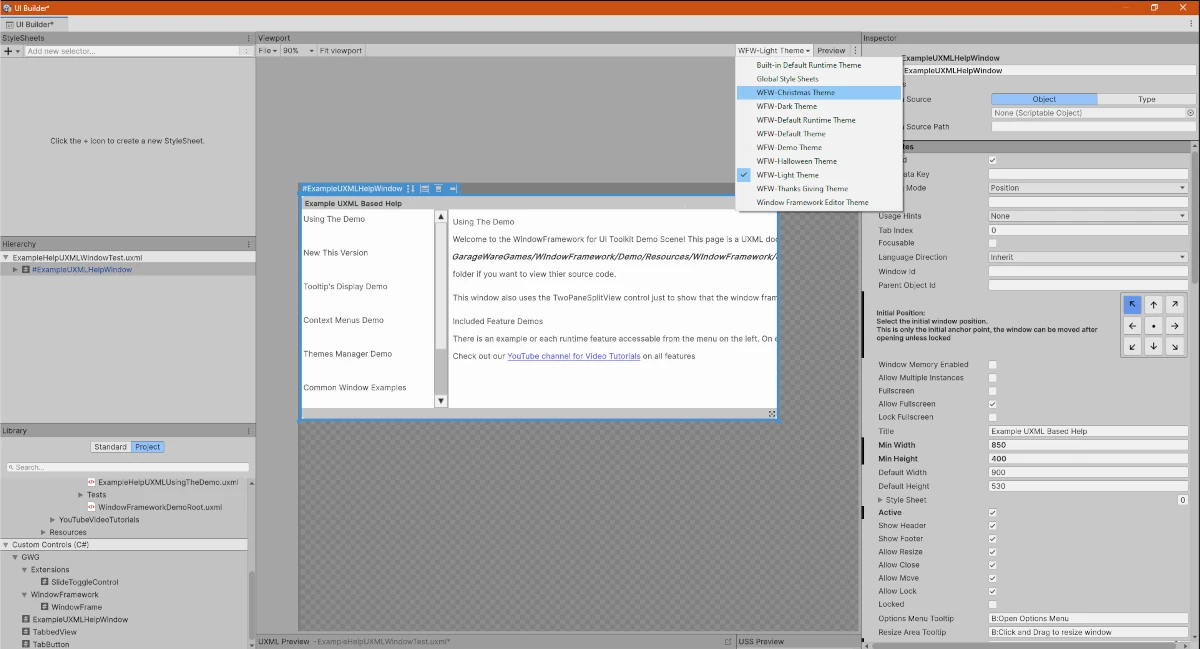
The Window Framework is UI Builder compatible and will show as a custom control so that you can use the visual features of the interface while creating your USS Style sheets. We have included a WindowFrameworkStylingTemplate.uxml file that has a single window loaded, take note of the window options that are available on the right hand inspector. Some of these settings need a runtime environment to work but other like size and header, footer options all work.
One thing to note is that the positioning system reacts strangely in UI builder, it is due to the absolute positioning and location load system built into the custom control and should be left in the upper left selection so that the rendered window does not move around on you during UI Builder GUI updates. When in Preview mode, movement and resizing work so you can full test your theme and style layouts, this also extends to many of the minor UI related functions. In the Demo for example, when in Preview mode the menu system works as expected, pages are instantiated into the preview and all non-runtime related values work as they would at runtime. Any of your custom window types can be setup to allow this functionality and the UXMLBasedDemoWindow.cs file in the Demo/Scripts folder can be used as an example of creating window frames as a partial class UXML Element.
WindowFrameworkStylingTemplate.uxml Open in UI Builder
Demo Example Open in UI Builder showing theme options
Using UI Builder and a Code Editor to edit Theme Values
The Theme system uses variables meaning that if you use our recommended template as a starting point, you have access to the needed items to style window frames, tooltips and context menus. With the linking abilities of the theme system you can expand these themes to meet any need. You can edit these variable in UI Builder as it does have the capability however it is still a little clumsy to use, We are sure this will get better in time but for now we have found that using your code editor to change variable values and UI Builder to view the results. One nice thing in UI Builder is that when you save your file in the code editor the display updates automatically and both Rider and Visual Studio editors have color pickers along with validators for values.
Global Styles Theme -or- Stylesheet Asset
Optional
The Optional Global Stylesheet can be a Unity Theme or Stylesheet asset file. By using a Unity Theme asset (TSS) you can add all your smaller stylesheets that are used regardless of theme, things like fixed element layouts for example. The theme system will automatically apply the stylesheet defined in the Global Theme asset either before or after the rest of the theme style sheets are loaded based on the selected Global Load Order. This choice can be helpful if you are having value over-right issues and while you could use the runtime theme to link these files, you would loose the load order functionality.

Theme Application Methods
Themes can be applied to the WindowFrames or to the Panel that the WindowFrameControler is attached to. There is also an experimental feature to have the system try to find and monitor current and new panels being added and apply the theme automatically. This feature seams to work well but does have limitations.
- Theme Stylesheets can only be applied to active panels, if you are using panels that are enabled and disabled during play then have your panel pull the theme stylesheet list on enable so it always has the current version.
- We are still testing this with the new World Space UI elements, any feedback on application and reliability would be helpfull.
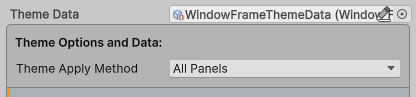
Alternatively, you can set the Theme Apply Method to Windows Only and then have panels or other elements subscribe to the WindowFrameController.OnThemeChanged event and let that update your stylesheets.
Testing and Applying New Themes in UI Builder
When you apply a theme using the Theme Manager you assign the Theme file you created for each of your individual themes. In the panel asset you set your Runtime theme with your global data as its default. With this configuration you can see you themes in UI builder while keeping them organized.
WFW-DefaultTheme.tss
WFW-DefaultThemeSettings.uss
WFW-DefaultStyling.uss
Player Theming
This feature is currently disabled because at the time of this writing, Unity does not support the loading of Style Sheet resources at runtime. We cannot imagine that this will be the case for long so the underlying system is there just disabled and hidden in the inspector. It will create theme folders in the persistent data directory, show them in the selector and clean up on destroy so it works…
BUT, as stated before, because Unity itself will not allow the Style Sheet to be loaded at runtime, the style sheets reference is always null. We are going to get this working so we are leaving the underlying support logic in the system, just disabled for now, we will enable this feature and publish an updated as soon as we can figure out a way around the Unity limitation or, hopefully, Unity adds the load at runtime ability.